Showing posts with label easy. Show all posts

13 August 2011

Chicken Breasts with Tomatoes and Herbs

So I'm sure upon reading this post, my mom will be shocked that I'm sharing a recipe with tomatoes as one of the main ingredients. I am not a fan of tomatoes.  I would pick them out of spaghetti sauce as a child. The closest thing I would eat to tomatoes when I was little was ketchup and pizza sauce.  To this day, I'll still pick tomatoes out of a salad and give them to my husband.  Bruschetta with chopped tomatoes and fresh herbs--nope.  Caprese salad with fresh mozzarella--only the cheese, please.  Chunky salsa--chips dipped to absorb juice only, no chunks. 
 
I feel like, as an adult, I should be past this picking-stuff-out-of-my-salad phase.  Tomatoes are a grown-up food.  And good for you.  So why am I so averse to them?  I don't know.  But I made a decision a little while ago to make myself at least try recipes with fresh tomatoes.  I've come across some that have been OK. Some that the husband loved (read: chock full of tomatoes and little else).  But none that I have truly enjoyed.  Until I came across this recipe in this month's Bon Appetit.  I had to share it. The tomatoes are both sweet and a little sour, the butter adds a nice richness to it, and the herbs make it taste light and fresh. All together it makes for a tasty dish.  You only need a nice green salad to go along side.

BA has this great section in it called "Fast, Easy, Fresh", and that is exactly how I would describe this dish.  It is really simple.  All you do is mix some oregano and spices into soft butter, sautee up some chicken breasts in some of the butter, then char up some tomatoes in that same pan. And you're pretty much done.  Mom will be so proud, I'm eating my tomatoes!
Some notes on this recipe:
- Use a meat thermometer to measure the internal temperature of the chicken breasts to make sure they are done right, not too raw, not too dry. You're looking for a temp 150-155F.  Tenting them with foil after this point and letting them rest will increase the temperature and redistribute the juices back through the meat, keeping it moist.
- After you remove the chicken from the pan, toss the tomatoes right in on top of the pan juices and any bits from the chicken.  There is lots of flavor in what is left over and you don't want to lose it.  
- Get a good char on the tomatoes, again, another good source of flavor.  Once they get a little caramelized, that's when they start to get sweet.
Chicken Breasts with Tomatoes and Herbs
slightly adapted From Bon Appetit
Printable version
Ingredients
4 tablespoons (1/2 stick) unsalted butter, room temperature
2 garlic cloves, minced
1 tablespoon chopped fresh oregano
1 teaspoon sweet paprika
Kosher salt and freshly ground black pepper
4 skinless, boneless chicken breasts
4 cups mixed cherry tomatoes (1 1/2 lbs)
2 tablespoon chopped fresh flat-leaf parsley

1. Mash butter, garlic, oregano, and paprika in a small bowl to blend. Season to taste with salt and pepper.
 
2.  Add half of the oregano butter to a medium heavy skillet and melt over medium heat. Season chicken with salt and pepper. Add chicken to skillet, cover, and cook until no longer pink in center, or a thermometer reads 150-155F, about 5 minutes per side (depending on how big thick the chicken is). Transfer chicken to a plate. Tent chicken with foil to keep warm.
3. Increase heat to high. Add tomatoes to skillet and cook, stirring occasionally, until they begin to char and burst, about 5 minutes. Add remaining oregano butter to skillet. Crush tomatoes slightly to release juices; stir 1 minute. Season sauce to taste with salt and pepper. Spoon tomato sauce over chicken. Garnish with parsley.

31 July 2011

Salt-crusted Burgers with Lentil Hummus and Roasted Red Peppers

 
I'm back again.  I can't believe that I've gotten 2 posts completed in 2 weeks!  I'm so proud of myself.  And I'm totally loving getting back into sharing my kitchen with you guys again.
  
I've been doing a little experimenting in the past few months with lentils.  They're something I'm trying to use more of in my meals.  Lentils are a nutritional powerhouse with all sorts of fiber and protein in a calorie-light package. But I honestly had no idea how to use them before I saw this recipe.  I always thought of them as something you should eat, but not actually want to eat.  The more I research I've done, the more I'm finding out that I do actually want to eat them!  I'm looking forward to sharing more of my discoveries in future posts.
Lentils also make a great replacement for the carbs I feel like I'm not "allowed" to eat.  As I started eating less and less "white carbs" like bread and potatoes, I really missed the things that often go along with them, like hamburger buns and hamburgers.  I love love love a really good hamburger, but it seems weird to me to just eat a piece of cooked ground beef on a plate.  So when I came across this recipe, I realized that I had found exactly what I was looking for--I didn't even miss the bun.  Plus, it's super easy, and that is always good.  It's become a staple in my kitchen when I don't feel like cooking a big meal, but don't want to go out, either.  This burger, combined with the lentil hummus and roasted red peppers makes for a great balance of sweet and salty and a little garlicky.  You could even serve this with a nice salad if you would like to get a little more veggies into your day.

A few notes about this recipe:
-It actually calls for canned lentils, but I couldn't find that, so I just used dried lentils.  You'll want to cook them until very tender, it makes blending them much easier.
- If you're not familiar with tahini, it's a paste made out of sesame seeds.  It's also the other staple ingredient in traditional chickpea-based hummus.  You can find it in most grocery stores, but sometimes it's by the peanut butter and sometimes in the ethnic food section.  Here is one brand that I've been able to find easily.
- To prevent the burgers from cooking too fast on the outside and staying raw on the inside, let them sit out at room temperature for 30-60 minutes before cooking them.
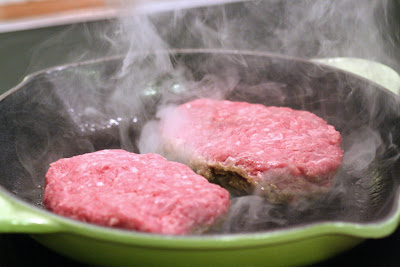
- What is really special about these burgers is the crust that forms on the bed of salt at the bottom of the pan.  The salt keeps the burgers slightly off the pan and lets the juices dissolve the salt.  It then forms a crunchy layer on the outside of the burger.  To make sure this happens, try to evenly distribute the salt in an area the same size as the burgers in the pan and place the formed burgers right on top of the salt.
- This recipe makes 2 8oz burgers.  Feel free to make 4 4oz burgers or however you want to do it.
- That also goes for making the hummus, if you want more garlic, add more garlic, or tahini, or lemon juice or whatever. When I make this, I just use the big spoons in my silver wear drawer and take 2 big scoops of tahini out of the jar.  I'm not much for exact measuring unless I'm baking, so don't stress too much.
- I haven't tried it, but I'm sure you could use ground turkey or chicken, but you may need to add a little fat to the pan to keep it from sticking.
Salt-crusted Burgers with Lentil Hummus and Roasted Red Peppers
adapted from: Jules at the Stone Soup
Printable Version

Ingredients:
1lb Ground Beef
½ cup Dried Lentils, rinsed
4 Tbsp Lemon Juice
2 cloves Garlic, peeled and smashed
4 Tbsp Tahini
1 Jar Roasted Red Peppers (10Oz)

Directions:
1. Put drained lentils into a saucepan, cover with about 2" of water and bring to a boil over high heat.  Turn the heat down to medium/med high and simmer for 20 minutes or until very tender. 

2. Meanwhile, heat a frying pan on a very high heat. Sprinkle a scant teaspoon of salt over the base of the pan, concentrating the salt under where you will place your burgers.
 
3.  Shape the beef into 2 burger patties (the thinner they are, the faster they will cook).   Cook burgers for 3-4 minutes on each side.  This will cook them to medium rare, leave on for longer if you want them a little less pink in the middle.
4.  While the burgers are cooking, blend lentils, lemon juice, garlic and tahini in a food processor or blender until smooth. Taste. Season.

5. When the burgers are cooked, remove from the pan to let rest and add the drained peppers. Cook peppers for a minute or until just heated through.

6. Serve burgers on a scoop of hummus and top with peppers.  Enjoy!

03 December 2010

Salad dressing...

With the holiday eating season upon us, I though I would throw in a little healthy blog in here to counter balance the shear amount of tasty treats I'm going to be eating in the next few weeks!  So, I decided upon salad dressing.  Why salad dressing?  Well, I think that it is the easiest way to make or break a salad.  Nothing turns me off of a salad more (aside from wilty lettuce) than gross, thick fatty salad dressing.  I've been through my fair share of store-bought dressing that has tons of MSG and preservatives, and all sorts of ingredients that have more than 15 letters in them.  

I had always wanted to make my own dressing, but I had always relied on the special bottles that had all the measurements on the side, built-in-mixer-things and "stay fresh" lids.  I always ended up making like 5 times as much as I needed and most of it would go bad. 
 
What really amazed me was how a little Grey Poupon jar helped it all change.  All you need to make great salad dressing at home is a small (8 oz or so) jar.  It's the perfect size to make dressing in-I was always making what seemed like a gallon of it.  I actually use an old mustard jar that is square, it helps me out with the "measuring".  The best part about these jars is I always seem to have one on hand, they're free, clean up nicely in the dishwasher and if you break it, well, it's replaceable!

So, after all this talk of salad dressing, I'm not even going to give you a recipe.  What my whole goal is for this blog is to give you a start on how to make your own dressings, with only a few little ratios to remember, some hints, and let you go to it!  I should admit here, that I figured a lot of this stuff out with the help of Jamie Oliver and his "Cook with Jamie" cookbook.  But I've found that nearly every recipe I've come across, has a similar foundation for building dressings.
  • 3:1. By that I mean your ratio of Oil to Vinegar (or another acid).  It doesn't matter what oil you use, or what vinegar or acid you use.  You could use olive oil and red wine vinegar like I did here or even Balsamic or white wine vinegar. Or skip vinegar all together and use lemon juice.  Go Asian style and use canola oil with a little sesame oil (it's a little stronger flavor, so you need to cut the sesame oil with something neutral like canola) and rice vinegar.
  • Emulsify.  Sounds complicated but isn't.  A little Dijon mustard goes a long way in preventing the dressing from separating.  I just use a little scoop (like for the above amounts, 1/4-1/2 of a dessert spoon).  For a creamier dressing add sour cream or yogurt.
  • A little sweet.  Now, don't go adding scoops and scoops of sugar!  I add about the same amount of honey as I do the mustard.  It rounds out the flavors a bit and takes a little of the bite out of the acid.
  • Season.  All you need now is a little salt and pepper.  I couldn't even begin to tell you how much to add.  For the amount above, a pinch of salt and a few grinds of pepper.  If you have a favorite spice blend, add a few pinches here, too. Fresh herbs, garlic, anything goes...
  • Shakey shakey. No fancy blenders or food processors here, shake away (just be sure your lid is on securely).
  • Taste for seasoning.  Take a leaf of lettuce (or your finger) and test it.  Does it need more salt/pepper?  Is the vinegar too much/not enough?   Just add whatever you think it is lacking and go from there.
  • Dress the salad.  Sounds simple and obvious, but this is the most important. Have you ever had a salad that was just swimming in dressing or had been sitting in the dressing for an hour or so?  Yuck.  The key in this is not to drown the salad.  It's best to dress the entire salad at once in a large serving bowl.  Just a light coating is all you need.  Pour a little over, toss gently with your fingers (or salad hands, which are my favorite). And serve.
So don't be afraid to make up your own combination of flavors/seasonings/ingredients.  You've got a basic ratio to start out with, and just run from there.  It is just so simple and delicious, you'll never want to buy another bottle again.

23 July 2010

Spiced Nuts

So after my nut butter post, I found myself with plenty of nuts left over and wondering what to do with them all.  I looked through my cookbook library, and found an old favorite that I couldn't believe I had forgotten about.  Now I love the mixed nuts you can get in the can at the store, don't get me wrong. But this is a big step-up from those.  The cayenne gives it a little heat, and the rosemary gives it a little freshness.  The brown sugar balances it all out.  It makes a quick and easy party snack...I've even given away small jars as gifts.
Some recipe notes: The more types of nuts you use, the better; I only used 3 types this time, and I wish I had included more (but that's what I had on hand, and didn't feel like making the trip to the store).  If you can't find unsalted nuts, salted are fine, just omit the salt in the recipe or this will be waaaaaaaayyyyy too salty.  These are awesome served warm, but that isn't necessary, they are pretty dang good at room temperature, too.


The Union Square Café Bar Nuts
from Nigella Bites by Nigella Lawson
for printable recipe click here

18 ounces assorted unsalted nuts, including peeled peanuts, cashews, Brazil nuts, hazelnuts, walnuts, pecans and whole, unpeeled almonds (about 2 1/4 c)
2 Tbsp coarsely chopped fresh rosemary
1/2 tsp cayenne pepper
2 tsp dark brown sugar
2 tsp sea salt
1 Tbsp butter, melted

Preheat oven to 350F

Toss the nuts in a large bowl to combine and spread them out on a baking sheet.  Toast in the oven till they become light golden brown, about 10 minutes.

In a large bowl, combine the rosemary, cayenne, sugar, salt, and melted butter.

Thoroughly toss the toasted nuts in the spiced butter and serve warm.

11 July 2010

Strawberries Marinated in Balsamic Vinegar

So, it's been a while...I've been away and haven't had a chance to get back to blogging.  I'm actually really surprised how much I've missed it.  I've enjoyed posting my recipes and pics, and I really hope you all have enjoyed my posts, too!

The strawberries right now are insane...in season, they are so sweet and fresh and cheap.  Plus they are everywhere.  Whenever I think of strawberries I think summer!  So I've gone searching for a good summertime strawberry recipe and I've found one.  Strawberries marinated with balsamic vinegar with marscarpone cheese is one of my favorites.
Now, strawberries and balsamic vinegar, when I first heard that combination, sounded more than a little off-putting to me.  If it does to you too, hang with me, because it is awesome!  This is one of my stand-by desserts that is great if you want something that is fresh and light-tasting, and truly easy to make.  It would work great for dinner parties, because everything can be made ahead of time (and since you have to marinate the strawberries for a while, you should make it early) and just assemble it table-side.  Or you can make a presentation of it and deliver to your guests and bathe in their praise:).  But most importantly, enjoy it and share with those you love!
A couple of notes on this recipe...Although I have given quantities of the ingredients, they are just to give a general idea of how much to use, I honestly can't remember the last time I measured anything out when I make this, it just seems to work.  Also, it does call for a vanilla pod, but since those tend to be a little spendy, just a splash or 2 of vanilla extract works as well.  Fresh, super-ripe strawberries work the best, I haven't tried frozen ones, but I think that the texture once they are thawed won't be right, so I'm going to have to recommend against it.
Strawberries Marinated in Balsamic Vinegar
From Jamie Oliver's The Return of the Naked Chef
Serves 4

1-ish lbs of strawberries, hulled
~5 tbsp sugar, to taste
10 tbsp balsamic vinegar
1 vanilla pod
14 oz mascarpone cheese
4 or 5 leaves of fresh mint or basil, finely sliced


Place strawberries in a bowl and scatter generously with the sugar followed by the balsamic vinegar.  Stir around and allow to marinate for up to 2 hours.
Score the vanilla pod length-wise and remove the seeds by running a knife along the inside, scraping the seeds away.  Mix the seeds with the mascarpone cheese and sweeten to taste with a little sugar.
 
Place a scoop of marscapone on a dish, cover with strawberries and balsamic juice, and finish with a sprinkle of mint or basil.

29 June 2010

Herb-coated Pork Tenderloin with Creamy Polenta

This recipe is the recipe where I learned how invaluable a meat thermometer is in the kitchen. It can make you look like a meat-roasting genius!  Especially with pork.  I know many people who are afraid of under-cooking pork for fear of trichinosis, and then cook the crap out of the pork chop/loin/whatever until it is the consistency of shoe leather and equally as tasty.  Cooking the meat that long is unnecessary.  You can kill all the uglies that could be in pork (which, by the way, have been reduced drastically with current farming practices) at 160F.  So, cooking to a temp of 155F and letting it rest for 10 minutes will increase the internal temp to the required 160, and you're good to go.  It will still be pink inside, but that doesn't mean that it's unsafe to eat, it will just be much more juicy and tender.

So talking about thermometers, the one that I've found to be the most useful is a probe thermometer that can be left in the oven and the temperature can be read on a display that can stay outside.  That way, you can keep an eye on the temperature much more easily. You also don't have to stick your head in the oven every 10 minutes to check on it (like I used to do with the one I had previously that was just a dial on a probe).  But please note, that probe stays HOT.  Just because you take the meat out of the oven and let it rest for a few minutes, doesn't mean the probe cools off.  And I'm speaking from experience, I can't tell you how often I've burned my fingertips trying to take it out of the meat.  You've been warned ;).

Another few notes...I've tried the pork on the grill, and it turns out wonderfully, in fact, I think it's even better grilled, just be sure to keep an eye on the temperature so it doesn't over-cook.  Adding a handful or 2 of grated Parmesan cheese to the polenta works well, too.

Herb-coated Pork Tenderloin with Creamy Polenta
From Cooking Light magazine

Pork
1 Tbsp chopped fresh rosemary
1 Tbsp chopped fresh thyme
1 Tbsp chopped fresh marjoram
1 Tbsp chopped fresh oregano
1 Tbsp extra virgin olive oil
1/2 tsp salt
1/4 tsp freshly ground black pepper
4 garlic cloves, minced
2 (1-lb) pork tenderloins, trimmed
Cooking spray

Polenta
1/2 c finely chopped onion
2 garlic cloves, minced
1/2 c dry white wine (or vermouth)
4 c water, divided
1 c dry polenta (or yellow corn meal)
1 Tbsp butter
1 tsp salt
1/4 teaspoon freshly ground black pepper

  1. To prepare pork, combine first 9 ingredients in a large zip top bag; seal and marinate in refrigerator overnight or up to 2 days (longer marinating time=more herb flavor).
  2. Preheat oven to 400 F
  3. Remove pork from bag.  Place pork on a broiler pan coated with cooking spray.  Bake at 400F for 30 minutes or until a thermometer registers 155F.  Remove from oven, cover and let stand for 10 minutes before slicing.
  4. To prepare polenta, heat a medium sauce pan over medium-high heat.  Coat pan with cooking spray.  Add onion and 2 garlic cloves, saute 2 minutes.  Add wine, cook 5 minutes or until liquid almost evaporates.  Add 2 cups water, reduce heat, and simmer 5 minutes.  Gradually add polenta, stirring constantly with a whisk.  Cook over medium heat 15 minutes or until thick an creamy, stirring frequently and gradually adding remaining 2 cups water.  Stir in butter, salt and pepper, add more to taste.  Serve with pork.

17 June 2010

Greek Orzo and Grilled Shrimp Salad

My friend Lea went to the South Beach Food and Wine festival a few years ago.  I was totally jealous because she got to meet a bunch of the Food Network chefs and watch them cook live and in person.  She also brought a present back for me...a cookbook...autographed by Bobby Flay!  Quite possibly one of the coolest gifts I've ever gotten.  I've used that cookbook so much that I've broken the spine, stained almost every page with some sort of ingredient or sauce or something. Every page except the one with his autograph--that one I should probably frame or preserve or encase in glass (maybe that's a little too extreme, so I'll just take a picture).
But anyway, as much as I treasure the autograph, this cookbook is even better!  Some of my favorite summertime recipes are from it, as is today's recipe.  Greek Orzo and Grilled Shrimp Salad with Mustard-Dill Vinaigrette is a great picnic salad.  It is summery and light and travels well to cook-outs, too. It's pretty straight-forward to make and can be made ahead of time, and is even better the second day.

If you aren't familiar with orzo, it's a rice-shaped pasta that cooks up pretty quickly.  If you can't find it, any small pasta will do (I've even made this salad with quinoa for a big protein, whole-grain punch).

So, without any further ado...here's the recipe:

Greek Orzo & Grilled Shrimp Salad with Mustard-Dill Vinaigrette
From Bobby Flay's Grilling for Life
Click here for printable recipe

Orzo Salad
1 3/4 cups orzo
1 large English cucumber, diced
3 green onions, thinly sliced
1 cup grape tomatoes, halved (or cherry tomatoes, quartered)
1/4 cup chopped fresh dill
1/4 cup white wine vinegar
1 tbsp Dijon mustard
1/2 tsp kosher salt
1/4 tsp freshly ground black pepper
1/2 cup olive oil
8 oz feta, crumbled

1.  Bring a large pot of salted cold water to a boil.  Add the orzo and cook until al dente, 7-8 minutes. Drain well.
2.  Combine orzo, cucumber, green onions, and tomatoes in a large bowl.
3.  Combine the dill, vinegar, mustard, salt and pepper in a blender and blend until smooth.  with the motor running slowly drizzle in the olive oil and blend until emulsified.  Pour the vinaigrette over the orzo mixture and stir well to combine.  Gently fold in the feta cheese.  Cover and refrigerate for at least 30 minutes and up to 8 hours.

Grilled Shrimp
24 medium shrimp, peeled and deveined
1 tbsp olive oil
1 tsp kosher salt
1 tsp freshly ground black pepper
Fresh dill

1.  Heat your grill to high (or you can also use a grill pan).
2.  Place the shrimp in a large bowl, toss with the oil and season with the salt and pepper.  Grill for 1 1/2  to 2 minutes per side until just cooked through.
3.  Remove the orzo salad from the refrigerator and transfer it to a large platter.  Top with the grilled shrimp and garnish with the dill before serving.


06 June 2010

Puffed Apple Pancakes

This recipe is one of my favorite breakfast recipes ever for many reasons.  First, it tastes awesome, which is key.  The second is it's just so dang pretty as it comes out of the oven, all puffy and golden yumminess, that I feel like a kitchen genius every time I make it.  And last, but definitely not least, is that it is super easy.  Once I discovered this recipe I've made it pretty much every weekend since.  It is the staple Saturday morning breakfast for my husband and me every week.

My husband had to work this past Saturday, but did it stop me from making it?  Nope (sorry you missed out, Babe).  I biked on over to my friend Ashley's house and we made a little brunch ourselves with it.  I was so excited to share it with a new friend and she was excited about making it for her husband when he gets back.  That is what cooking is about to me, sharing the love.  And now I get to share it with all of you!

Just some quick notes about this recipe...It serves 4, but since it's just my husband and me, I always make half a recipe and it turns out great (the pictures here are also of a half-recipe).  You can use whatever kind of apple you have on hand.  I've used Gala, Pink Lady, Honey Crunch and Granny Smith (I think I used Ida Red in this recipe, but the sticker was in German so I'm not sure) they all work just as well.  I also just discovered when I was making this yesterday that it says to peel the apples first--totally missed that all the times I've made this recipe (which is A LOT).  So I guess what I'm saying, is that you don't actually have to peel them (although I think that it would make slicing it up a little neater). 

Puffed Apple Pancakes
    Adapted from Bon Appetit's Fast, Easy, Fresh Cookbook
    Click here for printable version

4 tablespoons (1/2 stick) unsalted butter
12 ounces Golden Delicious apples (about 2), peeled, cored, thinly sliced

1 cup whole milk
4 large eggs
3 tablespoons sugar
1 teaspoon vanilla extract
1/2 teaspoon salt
1/4 teaspoon ground cinnamon
2/3 cup all purpose flour

3 tablespoons (packed) golden brown sugar


Preheat oven to 425°F.   While oven is heating, place butter in 13"x9" glass baking dish (if you're making a half-recipe, 8"x8" or a round baker works well, too).  Place dish in oven until butter melts, about 5 minutes.  Remove dish from oven.  Place apple slices in overlapping rows atop melted butter in baking dish.  Return to oven and bake until apples begin to soften slightly and butter is bubbling and beginning to brown around edges of dish, about 10 minutes (I also do this while the oven is still pre-heating, although it usually takes a bit longer).

Meanwhile, whisk milk, eggs, sugar, vanilla, salt, and cinnamon in large bowl until well blended.  Add flour and whisk until batter is smooth.

Pour batter over apples in dish and sprinkle with brown sugar.  Bake pancake until puffed and brown, about 20 minutes.  Gather family around to admire your puffy golden creation and dig in while it's still warm!

This is awesome with just a drizzle of real maple syrup or you can sprinkle with powdered sugar.  I think next time I may fry up some bacon or breakfast sausages, too!