Showing posts with label main. Show all posts

31 July 2011

Salt-crusted Burgers with Lentil Hummus and Roasted Red Peppers

 
I'm back again.  I can't believe that I've gotten 2 posts completed in 2 weeks!  I'm so proud of myself.  And I'm totally loving getting back into sharing my kitchen with you guys again.
  
I've been doing a little experimenting in the past few months with lentils.  They're something I'm trying to use more of in my meals.  Lentils are a nutritional powerhouse with all sorts of fiber and protein in a calorie-light package. But I honestly had no idea how to use them before I saw this recipe.  I always thought of them as something you should eat, but not actually want to eat.  The more I research I've done, the more I'm finding out that I do actually want to eat them!  I'm looking forward to sharing more of my discoveries in future posts.
Lentils also make a great replacement for the carbs I feel like I'm not "allowed" to eat.  As I started eating less and less "white carbs" like bread and potatoes, I really missed the things that often go along with them, like hamburger buns and hamburgers.  I love love love a really good hamburger, but it seems weird to me to just eat a piece of cooked ground beef on a plate.  So when I came across this recipe, I realized that I had found exactly what I was looking for--I didn't even miss the bun.  Plus, it's super easy, and that is always good.  It's become a staple in my kitchen when I don't feel like cooking a big meal, but don't want to go out, either.  This burger, combined with the lentil hummus and roasted red peppers makes for a great balance of sweet and salty and a little garlicky.  You could even serve this with a nice salad if you would like to get a little more veggies into your day.

A few notes about this recipe:
-It actually calls for canned lentils, but I couldn't find that, so I just used dried lentils.  You'll want to cook them until very tender, it makes blending them much easier.
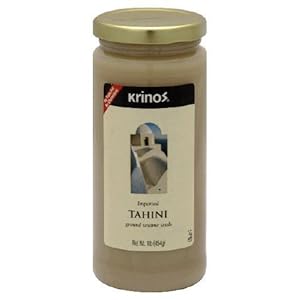
- If you're not familiar with tahini, it's a paste made out of sesame seeds.  It's also the other staple ingredient in traditional chickpea-based hummus.  You can find it in most grocery stores, but sometimes it's by the peanut butter and sometimes in the ethnic food section.  Here is one brand that I've been able to find easily.
- To prevent the burgers from cooking too fast on the outside and staying raw on the inside, let them sit out at room temperature for 30-60 minutes before cooking them.
- What is really special about these burgers is the crust that forms on the bed of salt at the bottom of the pan.  The salt keeps the burgers slightly off the pan and lets the juices dissolve the salt.  It then forms a crunchy layer on the outside of the burger.  To make sure this happens, try to evenly distribute the salt in an area the same size as the burgers in the pan and place the formed burgers right on top of the salt.
- This recipe makes 2 8oz burgers.  Feel free to make 4 4oz burgers or however you want to do it.
- That also goes for making the hummus, if you want more garlic, add more garlic, or tahini, or lemon juice or whatever. When I make this, I just use the big spoons in my silver wear drawer and take 2 big scoops of tahini out of the jar.  I'm not much for exact measuring unless I'm baking, so don't stress too much.
- I haven't tried it, but I'm sure you could use ground turkey or chicken, but you may need to add a little fat to the pan to keep it from sticking.
Salt-crusted Burgers with Lentil Hummus and Roasted Red Peppers
adapted from: Jules at the Stone Soup
Printable Version

Ingredients:
1lb Ground Beef
½ cup Dried Lentils, rinsed
4 Tbsp Lemon Juice
2 cloves Garlic, peeled and smashed
4 Tbsp Tahini
1 Jar Roasted Red Peppers (10Oz)

Directions:
1. Put drained lentils into a saucepan, cover with about 2" of water and bring to a boil over high heat.  Turn the heat down to medium/med high and simmer for 20 minutes or until very tender. 

2. Meanwhile, heat a frying pan on a very high heat. Sprinkle a scant teaspoon of salt over the base of the pan, concentrating the salt under where you will place your burgers.
 
3.  Shape the beef into 2 burger patties (the thinner they are, the faster they will cook).   Cook burgers for 3-4 minutes on each side.  This will cook them to medium rare, leave on for longer if you want them a little less pink in the middle.
4.  While the burgers are cooking, blend lentils, lemon juice, garlic and tahini in a food processor or blender until smooth. Taste. Season.

5. When the burgers are cooked, remove from the pan to let rest and add the drained peppers. Cook peppers for a minute or until just heated through.

6. Serve burgers on a scoop of hummus and top with peppers.  Enjoy!

27 July 2011

My new favorite roast beef

WOW.  It has been a while since I have blogged. I really cannot believe it has been since February.  I'm kind of embarrassed I am about neglecting this place.  I really used to enjoy it, and then for some reason I stopped. I can't for sure say why.  I think it had a lot to do with me changing my whole way of eating in January.  I went on a diet.  Not the new-year's-resolution kind of diet, actually not a diet at all, but a "lifestyle change" as the experts like to say.  It kind of depressed me to not be able to eat the "good" stuff.  Like bread and potatoes and pasta and fruit and sugar. And Butterbretzels (my friends in Germany know the goodness of these big soft pretzels that have the fat end slit lengthwise and filled with butter).  But after all was said and done, I lost 20 pounds in 3 months and that made it all worthwhile.  I fell off the wagon for a little while, but I'm back on it.  Back to eating the way my doctor recommended (and hopefully dropping the last 15 pounds).  And now with a little experience under my belt in cooking that way, I'm excited to start up my blog again with a renewed enthusiasm in sharing my new way of cooking--but don't worry, I'll still be sharing the occasional sugar-loaded treats.
This recipe for roast beef is one that I've had for a several years, and it has been a success every time. I've made it several times before and it's only recently occurred to me to share it with all of you!  This is great for Christmas or New Years or any time you feel the need to celebrate with a big, delicious meal.  Now, all that being said, it is also great for the holiday times/entertaining because it is easy and doesn't require you to stand around at the stove for the entire time your guests are there.  Just a short saute of the mushroom after the beef comes out of the oven, and you are ready to chow down.
A few notes on this recipe:
- The most important thing in this recipe is to use a meat thermometer. I can't stress that one enough.  A thermometer can make you look like an absolute genius in the kitchen.  For me, I have no idea when something like a roast (or any cut of meat, really) is done unless I have a thermometer.
- Horseradish.  It is AWESOME! Even better when you can get in fresh and grate it yourself.  If you don't know what it looks like, it's a root that is long and narrow.  You absolutely have to peel it before you use it. The one I used in the picture above was about 9" long and maybe 1" in diameter.  If you can't find fresh horseradish, used the prepared stuff.  But NOT the creamy sauce stuff that is used on sandwiches.  That won't have nearly enough flavor. The prepared stuff will be in the refrigerated section.
- The horseradish/garlic/salt/pepper crust that goes on top of the beef will look like it has burnt to a crisp in the oven, well before your beef is done.  Don't panic.  That's just how it looks, trust your thermometer.  Once the beef is done, serve a little of the crust with each slice of meat, it is wonderful.  The original recipe calls for 1/2 c of salt in the crust. I found that to be too much, I recommend using only 1/3c.
- I've listed some vegetables to roast up with the meat.  Use these as a guideline, add more if you have room in your pan.  I don't have a great roasting pan at the moment, so I only used what would actually fit in the pan.  They turn out wonderfully, and every time I make this, I wish I had more veggies.
- Let the meat rest.  I can't stress this enough.  The meat won't get cold while it sits out.  Just tent some foil over the top.  Resting it allows all the yummy juices to go back into the meat.  If you serve it straight out of the oven, when you carve it up, all the juices will end up on the cutting board, and not in the meat where it should be, making the meat taste dry.  The internal temperature will also continue to rise as you let it rest.  
- A nice green salad would also be great with this.

Enjoy...and if you decide to make this, let me know how it turns out!
Horseradish and Garlic Prime Rib with Roasted Vegetables and Sauteed Mushrooms
Prime Rib:
1 (3-rib) Prime Rib Beef Roast, about 6 pounds
5 Garlic Cloves, smashed, plus 2 heads garlic, halved
1/2 cup Grated Fresh Or Prepared Horseradish
1/3-1/2 cup Sea Salt
1/4 cup Freshly Ground Black Pepper
1/2 cup Extra-Virgin Olive Oil
2 Carrots, peeled and chopped
2 Parsnips
1 Red Onion, halved
Wild Mushrooms:
1 Tbsp Unsalted Butter
Extra-Virgin Olive Oil
2 pounds Assorted Mushrooms, such as cremini, oyster, shiitake, chanterelle, or white, trimmed and sliced
Leaves From 2 Fresh Thyme Sprigs
Sea Salt And Freshly Ground Black Pepper
1/2 cup dry red wine
1/2 cup Reserved Beef Broth (Drippings From Roast) Or Low-Sodium Canned Broth
1/2 cup Heavy Cream
1 Tbsp Minced Fresh Chives 

Directions:
Preheat the oven to 350℉.

Lay the beef in a large roasting pan with the bone side down. (The ribs act as a natural roasting rack.) 
In a small bowl mash together the garlic, horseradish, salt, pepper, and olive oil to make a paste. Massage the paste generously over the entire roast. 
  
Scatter the vegetables and halved garlic around the meat and drizzle them with a 2-count of oil.
 
Put the pan in the oven and roast the beef for about 1 ½ to 2 hours for medium-rare (or approximately 20 minutes per pound). Check the internal temperature of the roast in several places with an instant-read thermometer; it should register 125℉. for medium-rare. 

Remove the beef to a carving board and let it rest for 20 minutes. The internal temperature of the meat will continue to rise by about 10 degrees. Remove the vegetables and set aside. Pour the pan juices into a fat separator or small bowl and set aside to allow the fat and beef juices to separate. Pour off and discard the fat. You will use the tasty beef juices for the mushrooms.

Wild Mushrooms:
Place a clean skillet over medium heat. Add the butter and a 2-count drizzle of oil. When the butter starts to foam. add the mushrooms and thyme; and season with salt and pepper. Stir everything together for a few minutes. Add the red wine, stirring to scrape up any stuck bits; then cook and stir to evaporate the alcohol. When the wine is almost all gone, add the reserved beef juices (or beef stock). Let the liquid cook down and then take it off the heat. Stir in the cream and chives, and season with salt and pepper.

16 November 2010

Spinach Soufflé

It's time again for my Daring Cooks' Challenge (which I missed last month).  This is my 3rd one and I think the most challenging in terms of blogging and photographing.

Dave and Linda from Monkeyshines in the Kitchen chose Soufflés as our November 2010 Daring Cooks’ Challenge! Dave and Linda provided two of their own delicious recipes plus a sinfully decadent chocolate soufflé recipe adapted from Gordon Ramsay’s recipe found at the BBC Good Food website.


I chose to make the Spinach (well actually it was watercress, but spinach was easier for me to acquire) Soufflé.  Now, I have always been intimidated by the thought of soufflés.  They were this "gourmet" super time consuming dish that should be left to the professionals.  But the only truly difficult thing about this dish was taking the photos for the blog!


Before I began my soufflé adventure, I watched this video by Julia Child, it's about 20-25 minutes long.  Amazing.  She has a way of breaking things down in such a way that it no longer seems like a daunting task.  After watching this, I was no longer afraid of the soufflé.  I highly recommend you watching this episode of The French Chef before starting out.  Any recipe notes I could give you would be straight from this episode anyway.

So without any further ado, here is the recipe...


Spinach Soufflé
printable version

Ingredients:

2 Tbsp  butter plus additional for the soufflé dish
3½ Tbsp plain (all purpose) flour
1 cup milk
½ cup parmesan cheese, finely grated plus additional for the soufflé dish
1 cup finely chopped spinach
4 large eggs, separated
½ tsp prepared mustard
¼ tsp cream of tartar*
Salt and pepper to taste
* If you can’t find cream of tartar, a dash (~ ½ tsp) of lemon juice can be substituted
Directions:

1. Butter the soufflé dish(es) thoroughly, then grate a small amount of cheese in each dish and tap so that the sides are evenly coated with the cheese. Place the dish(es) in the refrigerator until needed (according to some sites, this helps the soufflé climb). 

2. Preheat the oven to moderate 350º F 
3. Wash and chop the spinach if you haven’t already.
4. In a medium sized saucepan, melt the butter over medium heat, then stir in the flour to make a roux. Cook 1 minute, then add the milk, a little at a time, and stir until just thickened, about 1 minute. Add the cheese and stir until it’s just melted. Remove from heat then add the spinach, mustard, salt and pepper.
Roux
5. In a larger pan, bring water to a gentle simmer. Whisk the egg yolks in a bowl set just over this water until pale and slightly foamy – about 6 minutes. 
6. Mix the egg yolks into the spinach sauce.
7. Beat the egg whites and cream of tartar until they form stiff peaks yet are still glossy.
8. Fold the egg whites into the sauce in 3 additions so that it’s evenly mixed, but you don’t lose too much volume.
9. Remove the soufflé dish from the refrigerator and spoon the mix into it. Use a spatula to even the tops of the soufflés and wipe off any spills.
10. Bake 25 minutes for small dishes or 40 minutes if using a large soufflé dish, then serve immediately with a nice green salad and a glass of wine.

15 July 2010

Asian Noodle Salad with Cashew Butter--My first Daring Cooks' Challenge

The July 2010 Daring Cooks’ Challenge was hosted by Margie of More Please and Natashya of Living in the Kitchen with Puppies. They chose to challenge Daring Cooks to make their own nut butter from scratch, and use the nut butter in a recipe. Their sources include Better with Nut Butter by Cooking Light Magazine, Asian Noodles by Nina Simonds, and Food Network online.

I just joined the Daring Kitchen (see the link to the left) recently and this is my first experience with their challenges.  Basically what they do is a monthly challenge recipe that all members have to make and then blog about if they are bloggers.  It isn't a competition, but more like a way to experiment with new dishes/ideas that are a little bit out of the ordinary, things that most people wouldn't think to make on a daily basis and share experiences.  It's a monthly challenge, so be on the lookout on the 14th of each month for my monthly challenge post (I do realize I'm a day late, I misread the directions).

The first key ingredient in nut butters (aside from the nuts themselves) is a really good blender or a food processor to grind the nuts up to a spreadable consistency (Thanks to my neighbor Marie for the use of her--I don't have a good one, yet).  They'll turn grainy and pasty first, but then will eventually (after 2-4 minutes) smooth out to a creamy consistency.  I like my butters a little more chunky, so that's just a matter of blending for a shorter amount of time.


Some other things to keep in mind:
  • You may need to add a little oil as well, but do so in small (1 tsp) increments so you don't end up with an oily mess.  You can use the corresponding oil, or something with neutral flavor like canola oil.
  • Nut butters can be made out of any nut, raw or roasted, salted or unsalted.  If you do use salted, make sure you account for it in your recipe, you don't want to have yourself a salt bomb instead of a creamy sauce.
  • You can roast the nuts yourself for 10 minutes in a 350F oven.  Just lay them out on a baking sheet in a single layer.
  • You'll get half the yield of butter as volume of nuts. So 1 cup of nuts will make 1/2 c of butter
  • I could go on and on, but click here for even more information on nut butters.
For this dish, you can customize it by adding your own favorite vegetables like shredded cabbage, bean sprouts or slivered carrots (I left out the cucumber mainly because I forgot to buy it at the store).  You can also omit or substitute the shrimp with the protein of your choice.  I used packaged, roasted and salted cashews, and that worked well.


Asian Noodle Salad with Cashew Dressing
Click here for a printable recipe 

Yield: 4 servings


Cashew Butter:
1 cup (240 ml) cashews*
Cashew Dressing:
½ inch (1 cm) slice of fresh ginger, chopped
8 cloves garlic, more or less to taste, chopped
½ cup (120 ml) cashew butter
¼ cup (60 ml) soy sauce
3 Tablespoons (45 ml) sugar
3 Tablespoons (45 ml) vinegar
3 Tablespoons (45 ml) toasted sesame oil
¼ cup plus 1 Tablespoon (75 ml) water
Hot sauce to taste (optional)

Noodle Salad:
1/2 pound (225 g) linguine or thin rice noodles
1 tablespoon (15 ml) olive oil
1/2 pound (225 g) small or medium shrimp, peeled and deveined
1 large red bell pepper, cored and seeded, cut into thin strips
1 cucumber, peeled, seeded, sliced
1/4 cup (60 ml) sliced green onions
1/4 cup (60 ml) chopped fresh basil
1 tablespoon (15 ml) chopped cashews (optional garnish)
Lime wedges (optional)
  1. Make cashew butter: Grind cashews in food processor for about 2 minutes until smooth. (*Or start with ½ cup (120 ml) prepared cashew butter.)
  2. Prepare cashew dressing: Combine ginger, garlic, cashew butter, soy sauce, sugar, vinegar, sesame oil, and water in food processor or blender. Process/blend until smooth. Be sure to process long enough to puree the ginger and garlic. The dressing should be pourable, about the same thickness as cream. Adjust consistency – thinner or thicker -- to your liking by adding more water or cashew butter. Taste and add your favorite hot sauce if desired. (If the cashew butter was unsalted, you may want to add salt to taste.) Makes about 1 ½ cups (360 ml) dressing. Store any leftover dressing in the refrigerator.
  3. Prepare noodles according to package instructions in salted water. Rinse and drain noodles. Set aside.
  4. Heat oil in large non-stick pan over medium heat. Add shrimp to the pan and sauté for about 3 to 4 minutes or until opaque throughout. Alternately, cook shrimp in boiling water for about 2 to 3 minutes or until done.
  5. Slice basil into thin ribbons. Combine noodles, bell pepper, cucumber, onions, and basil in a large bowl. Add about ½ cup (120 ml) cashew dressing; toss gently to coat. Add more cashew dressing as desired, using as much or as little as you’d like. Scatter shrimp on top. Squeeze fresh lime juice over salad or serve with lime wedges. Sprinkle with chopped cashews if desired.

      29 June 2010

      Herb-coated Pork Tenderloin with Creamy Polenta

      This recipe is the recipe where I learned how invaluable a meat thermometer is in the kitchen. It can make you look like a meat-roasting genius!  Especially with pork.  I know many people who are afraid of under-cooking pork for fear of trichinosis, and then cook the crap out of the pork chop/loin/whatever until it is the consistency of shoe leather and equally as tasty.  Cooking the meat that long is unnecessary.  You can kill all the uglies that could be in pork (which, by the way, have been reduced drastically with current farming practices) at 160F.  So, cooking to a temp of 155F and letting it rest for 10 minutes will increase the internal temp to the required 160, and you're good to go.  It will still be pink inside, but that doesn't mean that it's unsafe to eat, it will just be much more juicy and tender.

      So talking about thermometers, the one that I've found to be the most useful is a probe thermometer that can be left in the oven and the temperature can be read on a display that can stay outside.  That way, you can keep an eye on the temperature much more easily. You also don't have to stick your head in the oven every 10 minutes to check on it (like I used to do with the one I had previously that was just a dial on a probe).  But please note, that probe stays HOT.  Just because you take the meat out of the oven and let it rest for a few minutes, doesn't mean the probe cools off.  And I'm speaking from experience, I can't tell you how often I've burned my fingertips trying to take it out of the meat.  You've been warned ;).

      Another few notes...I've tried the pork on the grill, and it turns out wonderfully, in fact, I think it's even better grilled, just be sure to keep an eye on the temperature so it doesn't over-cook.  Adding a handful or 2 of grated Parmesan cheese to the polenta works well, too.

      Herb-coated Pork Tenderloin with Creamy Polenta
      From Cooking Light magazine

      Pork
      1 Tbsp chopped fresh rosemary
      1 Tbsp chopped fresh thyme
      1 Tbsp chopped fresh marjoram
      1 Tbsp chopped fresh oregano
      1 Tbsp extra virgin olive oil
      1/2 tsp salt
      1/4 tsp freshly ground black pepper
      4 garlic cloves, minced
      2 (1-lb) pork tenderloins, trimmed
      Cooking spray

      Polenta
      1/2 c finely chopped onion
      2 garlic cloves, minced
      1/2 c dry white wine (or vermouth)
      4 c water, divided
      1 c dry polenta (or yellow corn meal)
      1 Tbsp butter
      1 tsp salt
      1/4 teaspoon freshly ground black pepper

      1. To prepare pork, combine first 9 ingredients in a large zip top bag; seal and marinate in refrigerator overnight or up to 2 days (longer marinating time=more herb flavor).
      2. Preheat oven to 400 F
      3. Remove pork from bag.  Place pork on a broiler pan coated with cooking spray.  Bake at 400F for 30 minutes or until a thermometer registers 155F.  Remove from oven, cover and let stand for 10 minutes before slicing.
      4. To prepare polenta, heat a medium sauce pan over medium-high heat.  Coat pan with cooking spray.  Add onion and 2 garlic cloves, saute 2 minutes.  Add wine, cook 5 minutes or until liquid almost evaporates.  Add 2 cups water, reduce heat, and simmer 5 minutes.  Gradually add polenta, stirring constantly with a whisk.  Cook over medium heat 15 minutes or until thick an creamy, stirring frequently and gradually adding remaining 2 cups water.  Stir in butter, salt and pepper, add more to taste.  Serve with pork.

      17 June 2010

      Greek Orzo and Grilled Shrimp Salad

      My friend Lea went to the South Beach Food and Wine festival a few years ago.  I was totally jealous because she got to meet a bunch of the Food Network chefs and watch them cook live and in person.  She also brought a present back for me...a cookbook...autographed by Bobby Flay!  Quite possibly one of the coolest gifts I've ever gotten.  I've used that cookbook so much that I've broken the spine, stained almost every page with some sort of ingredient or sauce or something. Every page except the one with his autograph--that one I should probably frame or preserve or encase in glass (maybe that's a little too extreme, so I'll just take a picture).
      But anyway, as much as I treasure the autograph, this cookbook is even better!  Some of my favorite summertime recipes are from it, as is today's recipe.  Greek Orzo and Grilled Shrimp Salad with Mustard-Dill Vinaigrette is a great picnic salad.  It is summery and light and travels well to cook-outs, too. It's pretty straight-forward to make and can be made ahead of time, and is even better the second day.

      If you aren't familiar with orzo, it's a rice-shaped pasta that cooks up pretty quickly.  If you can't find it, any small pasta will do (I've even made this salad with quinoa for a big protein, whole-grain punch).

      So, without any further ado...here's the recipe:

      Greek Orzo & Grilled Shrimp Salad with Mustard-Dill Vinaigrette
      From Bobby Flay's Grilling for Life
      Click here for printable recipe

      Orzo Salad
      1 3/4 cups orzo
      1 large English cucumber, diced
      3 green onions, thinly sliced
      1 cup grape tomatoes, halved (or cherry tomatoes, quartered)
      1/4 cup chopped fresh dill
      1/4 cup white wine vinegar
      1 tbsp Dijon mustard
      1/2 tsp kosher salt
      1/4 tsp freshly ground black pepper
      1/2 cup olive oil
      8 oz feta, crumbled

      1.  Bring a large pot of salted cold water to a boil.  Add the orzo and cook until al dente, 7-8 minutes. Drain well.
      2.  Combine orzo, cucumber, green onions, and tomatoes in a large bowl.
      3.  Combine the dill, vinegar, mustard, salt and pepper in a blender and blend until smooth.  with the motor running slowly drizzle in the olive oil and blend until emulsified.  Pour the vinaigrette over the orzo mixture and stir well to combine.  Gently fold in the feta cheese.  Cover and refrigerate for at least 30 minutes and up to 8 hours.

      Grilled Shrimp
      24 medium shrimp, peeled and deveined
      1 tbsp olive oil
      1 tsp kosher salt
      1 tsp freshly ground black pepper
      Fresh dill

      1.  Heat your grill to high (or you can also use a grill pan).
      2.  Place the shrimp in a large bowl, toss with the oil and season with the salt and pepper.  Grill for 1 1/2  to 2 minutes per side until just cooked through.
      3.  Remove the orzo salad from the refrigerator and transfer it to a large platter.  Top with the grilled shrimp and garnish with the dill before serving.


      23 May 2010

      Grandma's Stew

      So, this is my very first post as ShutterCook....the photographer and cook that I want to be. I thought the best way to start out this blog is with a dish that is an family favorite. My Grandma's Beef Stew is a comfort food that always makes me think of home. It's what my mom made every time it was cold out and we were expecting company. She would make it whenever I would come home from college or living somewhere far away. Even though I'm living in Germany now, it's one way for me to feel close to with my family, even when they are an ocean away.

      Now, as with many grandmas' recipes, this one is not so much about measuring as what's in it. I asked my grandma to help me make it one day, so I could get it right. I walked away with a full belly of warm stew, and a recipe with very little details, and a lot of "add about enough so it looks right". I've sort of adapted it to the way I like it, and it's a little different every time. I tried to keep track of what amounts I was adding as I made this, so now I'll actually have the recipe!


      Grandma's Beef Stew

      Olive oil
      1 Small Chuck roast, cut into bite-sized pieces (I used about 2lbs of meat)
      1 t Salt
      1/2 t Pepper
      1-2 T Garlic Powder (or more or less to your taste)
      2-3 Onions (red, white, whatever you have), cut into 1" pieces
      14 oz can of tomatoes
      3 large carrots, peeled and cut into 1" pieces (although I've used those packaged baby carrots, and those work pretty well too)
      4-5 Cloves
      1/4 head of cabbage, cut into 1" chunks
      3 good-sized potatoes cut into 1" chunks

      Heat a Dutch oven or stock pot over med-high heat and add a glug or so of olive oil. Once it's good and hot, add the meat and sprinkle with the salt, pepper and garlic powder. Brown on all sides.

      Once the meat is good and browned on all sides, add the onions and cook for a few minutes more.

      Add the tomatoes with the juice from the can, cloves, carrots and cabbage. Add enough water to cover the contents of the pot. Bring to a boil, then turn down the heat and simmer for at least 3 hours, adding the potatoes during the last hour of cooking so they don't get too soggy.

      Add additional salt and pepper to taste. This stew is even better reheated the next day, so make it early and let it get yummier. Serve with some crusty bread and enjoy with those you love!

      Click here for a printable recipe